Recently, a WPF desktop application that I was working on required the user
to select multiple files, which were typically in different directories. I had
implemented a “Browse” button that would allow the user to select these files
via a file selection dialog box . However, this becomes very tedious when you
are constantly selecting these different files. I decided to implement drag-n-drop
to make my users’ lives easier.
There are a few different approaches that you can take. You can use
a framework, such as the wonderful “GongSolutions.WPF.DragDrop”
library. This library is great if you require more advanced
drag-n-drop functionality. I was originally using this library to implement
the functionality that I needed, but later realized it was overkill. I
decided to go with a different approach. I decided to create a custom control
that derived from the TextBox control.
First, you will need to override the OnApplyTemplate method of
the TextBox control. OnApplyTemplate is called just before the
UI element is displayed in the application. This is a good place to
wire the drag/drop related events:
public override void OnApplyTemplate()
{
    // Make sure to call the base.OnApplyTemplate() first!
    base.OnApplyTemplate();

    DragEnter += FilePathTextBox_DragEnter;
    Drop += FilePathTextBox_Drop;
    PreviewDragOver += FilePathTextBox_PreviewDragOver;
}
We will now start implementing the event handlers that we specified
in the OnApplyTemplate method. Let’s start with the easy one
first: FilePathTextBox_PreviewDragOver. This handler tells the
control to show the user the little ‘+’ sign when he / she drags a file
onto the text box:
private void FilePathTextBox_PreviewDragOver(object sender, DragEventArgs e)
{
    e.Handled = true;
}
Now, let’s write the event handler that handles the event when the user drags
a file on to the custom text box:
private void FilePathTextBox_DragEnter(object sender, DragEventArgs e)
{
    var dragFileList = ((DataObject)e.Data).GetFileDropList().Cast<string>().ToList();
    var draggingOnlyOneFile = dragFileList.Count == 1 && dragFileList.All(item =>
    {
        var attributes = File.GetAttributes(item);
        return (attributes & FileAttributes.Directory) != FileAttributes.Directory;
    });

    e.Effects = draggingOnlyOneFile ? DragDropEffects.Copy : DragDropEffects.None;
}
The FilePathTextBox_DragEnter event handler gets a list of files that the user
dragged on to the text box. In the code above, we want the user to only be able to
drag 1 file (not directory) on to the text box. This filtering can be tailored to your
needs. This is left as an exercise to the reader.
Here is the last event that we need to implement:
private void FilePathTextBox_Drop(object sender, DragEventArgs e)
{
    var dragFileList = ((DataObject)e.Data).GetFileDropList().Cast<string>().ToList();
    var draggingOnlyOneFile = dragFileList.Count == 1 && dragFileList.All(item =>
    {
        var attributes = File.GetAttributes(item);
        return (attributes & FileAttributes.Directory) != FileAttributes.Directory;
    });

    e.Effects = draggingOnlyOneFile ? DragDropEffects.Copy : DragDropEffects.None;

    // Set the Text property of the custom text box to the path of
    // the file the user dropped.
    if (draggingOnlyOneFile)
        Text = dragFileList[0];
}
Here is the final, refactored implementation:
public class FilePathTextBox : TextBox
{
    public override void OnApplyTemplate()
    {
        base.OnApplyTemplate();
        DragEnter += FilePathTextBox_DragEnter;
        Drop += FilePathTextBox_Drop;
        PreviewDragOver += FilePathTextBox_PreviewDragOver;
    }

    private void FilePathTextBox_PreviewDragOver(object sender, DragEventArgs e)
    {
        e.Handled = true;
    }

    private void FilePathTextBox_DragEnter(object sender, DragEventArgs e)
    {
        var didUserOnlyDragOneFile = DidUserDragOnlyOneFile(e);
        SetDragDropEffect(didUserOnlyDragOneFile, e);
    }

    private void FilePathTextBox_Drop(object sender, DragEventArgs e)
    {
        var didUserOnlyDragOneFile = DidUserDragOnlyOneFile(e);
        SetDragDropEffect(didUserOnlyDragOneFile, e);

        if (draggingOnlyOneFile)
            Text = dragFileList[0];
    }

    private bool DidUserDragOnlyOneFile(DragEventArgs e)
    {
        var dragFileList = ((DataObject)e.Data).GetFileDropList().Cast<string>().ToList();
        var draggingOnlyOneFile = dragFileList.Count == 1 && dragFileList.All(item =>
        {
            var attributes = File.GetAttributes(item);
            return (attributes & FileAttributes.Directory) != FileAttributes.Directory;
        });

        return draggingOnlyOneFile;
    }

    private void SetDragDropEffect(bool shouldShowCopyEffect, DragEventArgs e)
    {
        e.Effects = shouldShowCopyEffect ? DragDropEffects.Copy : DragDropEffects.None;
    }
}
Cheers,
Connor Moreside
Overview
This article will discuss why you would want to setup R Studio Server and how to
perform the installation of R Studio Server on a Microsoft Azure VM:
- Introduction
- Creating a Virtual Machine in Microsoft Azure
- Installing R
- Installing R Studio Server
This article assumes that you already have a Microsoft Azure subscription. If
not, you can sign up for a trial so you
can follow along.
Introduction
R is a powerful language for performing data analysis. There are many different
tools that allow one to create and execute R scripts. You can write R programs
directly in the R console, or you can use a more full featured tool such as R
Studio or the newly released
R Tools for Visual Studio.
R Studio is a fantastic IDE for developing R scripts. It allows you to manage
your R scripts, install packages, view visualizations, and much, much more.
R Studio Server is essentially the R Studio IDE in the cloud. It allows
you to access your data analysis environment from any desktop
computer, tablet, or phone!
However, the greatest advantage of using R Studio Server is having the ability
to install it on a powerful VM where you can perform much more memory and CPU
intense analyses without fear of bogging down your local system.
One of the disadvantages of installing on an Azure VM is cost. Depending on
the size of the VM you pick, it can become quite costly. One way to mitigate
cost is to turn off the VM when you are not using it. You will not be charged
when the VM is shutdown.
Still sound like a good idea? Awesome! Let’s begin!
Create Virtual Machine
Begin by logging into the Microsoft Azure portal. In the left-side bar, click the
Virtual Machines link:
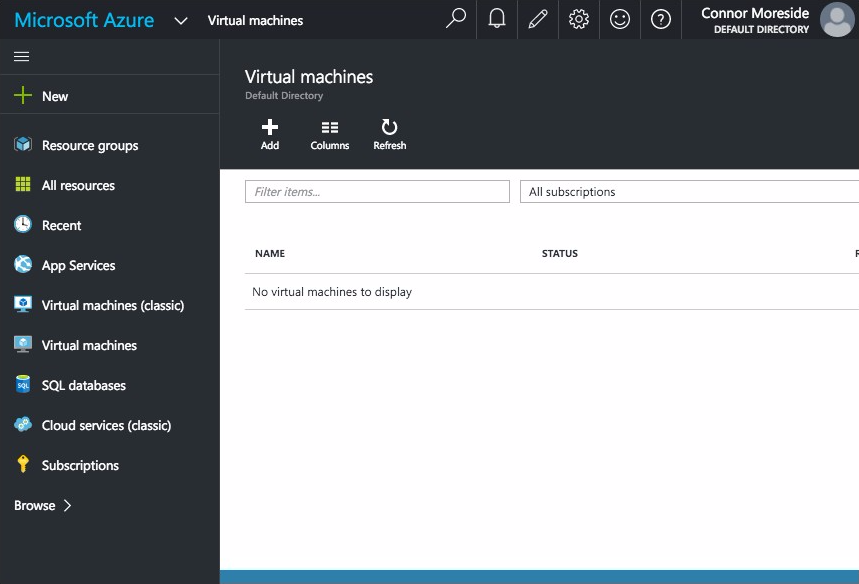
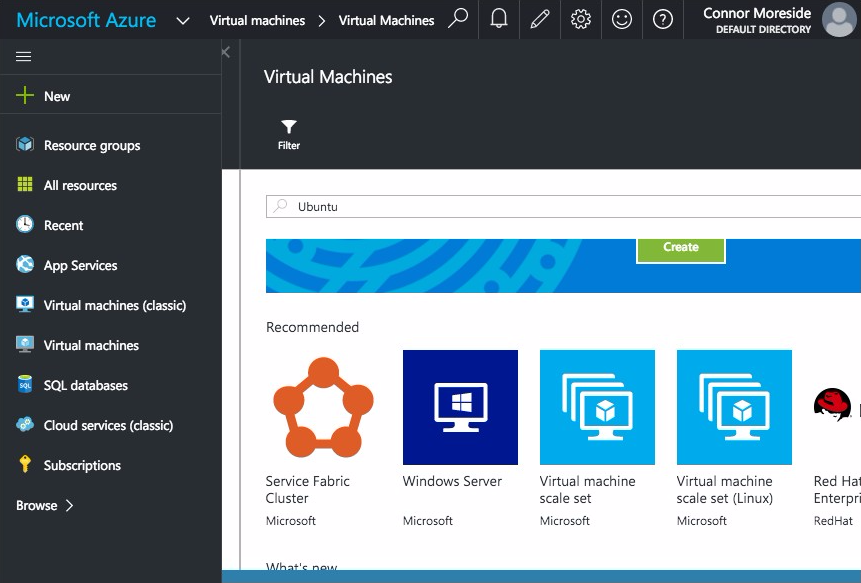
Click the Add button to create a new VM. From here, you can select what VM image
to use. We will be utilizing the “Ubuntu Server 14.04 LTS” image. Start typing
“Ubuntu” into the search bar at the top. You should see the aforementioned
image in the search results. Select this image to continue.
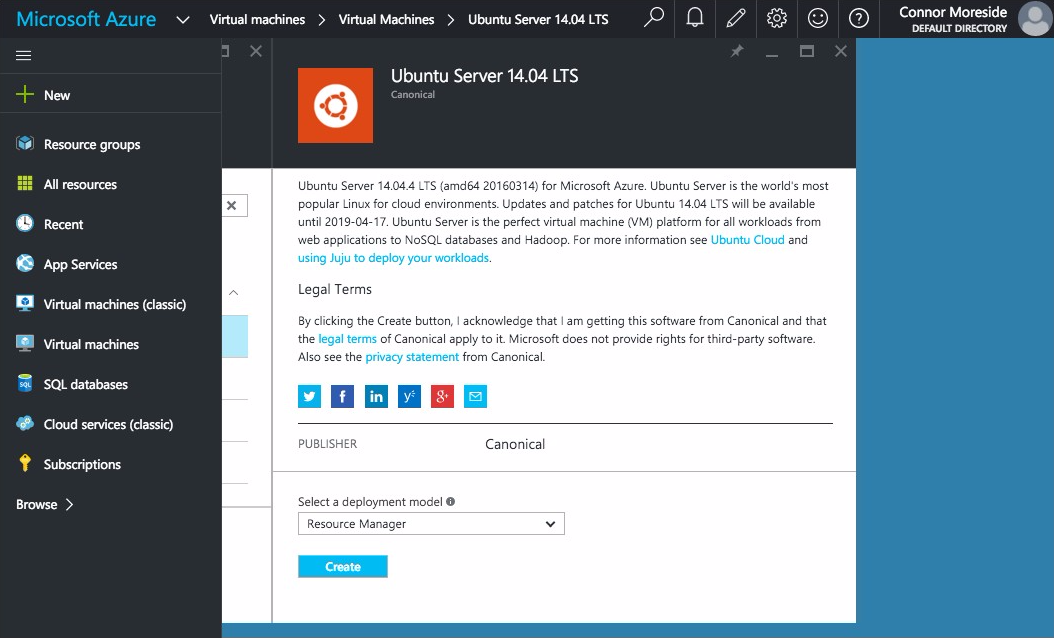
You will now be prompted to select a deployment model. We will just use
the default. Click the “Create” button.
It is now time to configure the VM. First, have to provide a name for the VM.
I chose RStudio. You can pick any name that suits your fancy. Now, you will
need to specify a user name. Enter “rstudioadmin”. There are two different authentication
mechanisms you can use. The simplest is just using a plain old password. Alternatively,
you can opt into using an SSH key to access your VM. In this article, we will just
use a password. If you want to use an SSH key, you can click the SSH tab and copy and
paste your public key into the text area.
Select the subscription to associate the VM. Now choose which resource group to
associate this VM with. We will create a new resource group for this VM.
Enter “RServer” as the name of the resource group. Now choose the location
where the VM will be located.
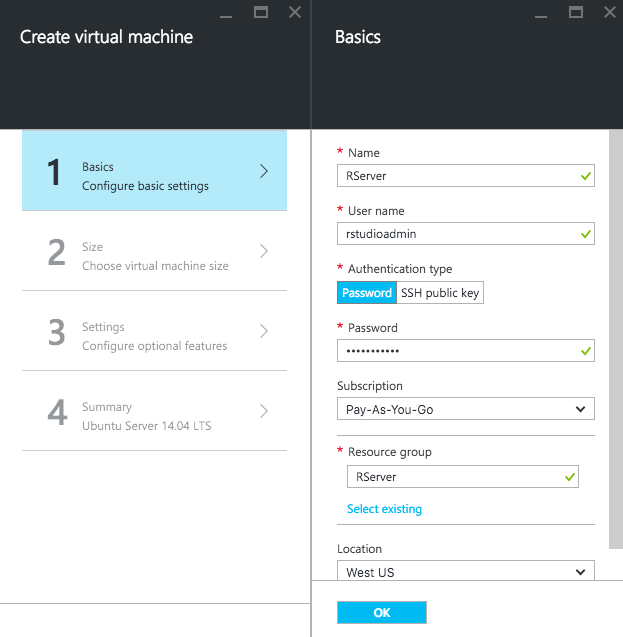
Click “OK”.
Now it is up to you to choose the size of the VM you would like to use. It will
depend on the size of datasets you will be analyzing and what type of analysis you
would like to perform on said datasets. It is usually in your best interests to have your
dataset fit in main memory so you don’t have to worry about paging. Here is a good rule of
thumb for estimating the size of your dataset in memory:
memory required = no. of column * no. of rows * 8 bytes/numeric
For example, if I had a dataset of with 4,000,000 rows and 130 columns, I would
need approximately:
4,000,000 * 130 * 8
= 4,160,000,000 / 1073741824
~ 3.87 GB
You would need approximately 3.87 GB of memory to store this dataset in memory.
Note that this estimation assumes that all the columns in the dataset are numeric. You
will want to create a VM that has at least as much memory as the estimated size of the
dataset you are analyzing. You also have to take into account the additional memory that
the operating system and R Studio Server requires in order to run. Doubling the amount of
memory should be more than sufficient.
Depending on the type of analysis you are performing, you may need a significant more
amount of memory. However, one of the beauties of using the Microsoft Azure platform
is that you can easily scale your VM’s capabilities to fit your needs :)
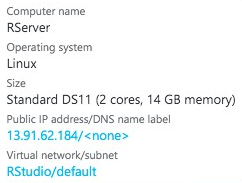
For this tutorial, we will be selecting DS11 Standard size, which includes
2 cores and 14 GB of memory.
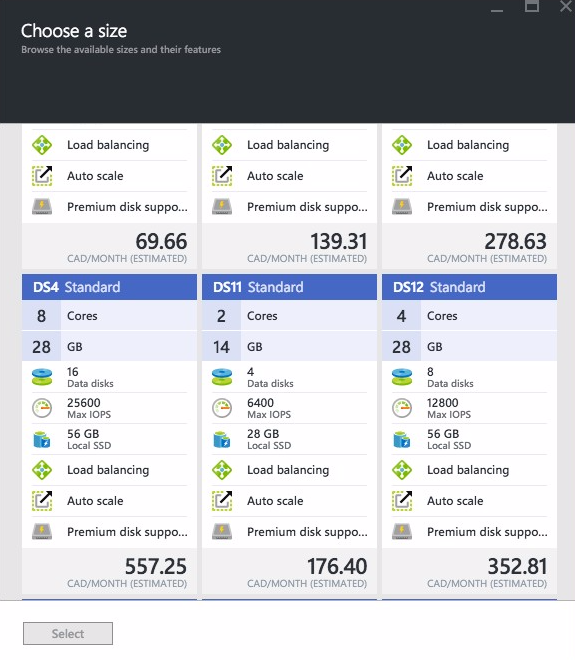
Select the DS11 machine size and click the “Select” button.
In the Settings section, we will just accept the defaults. Once on the summary
page, click “OK” to begin the procurement of the VM.
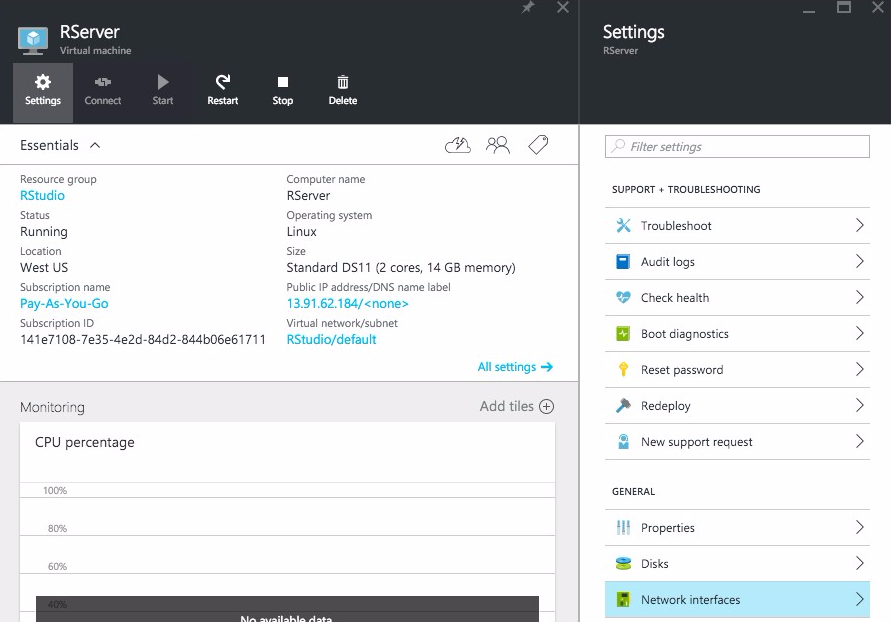
When the deployment of the VM has finished, we will now need to allow traffic on
port 8787 through to the VM. First, click on the “Virtual machines” link in the
sidebar. Click on the “RServer” virtual machine. Now click on the “Settings” button.
This will open the “Settings” blade. Within the settings blade, click the “Network
interfaces” link.
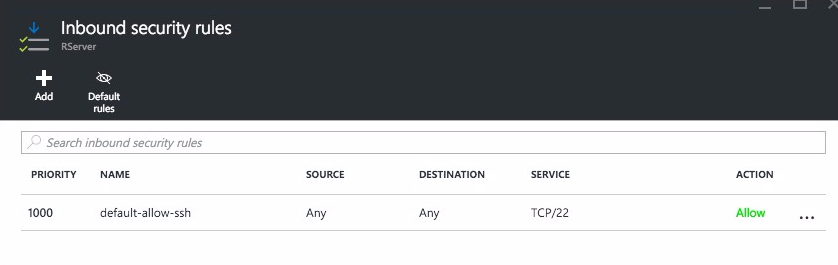
Now click on the “Network security group” link. Click on the only security
group in the resulting page. From here, we can make a new “Inbound security rule”.

Click the “Add” button to add a new “Inbound Security rule”.
We will first need to provide a name for this security rule. Call it “RStudio”.
We can leave the “Priority” field alone. Change the “Destination port range” to 8787. This
is the default port that R Studio server runs on.
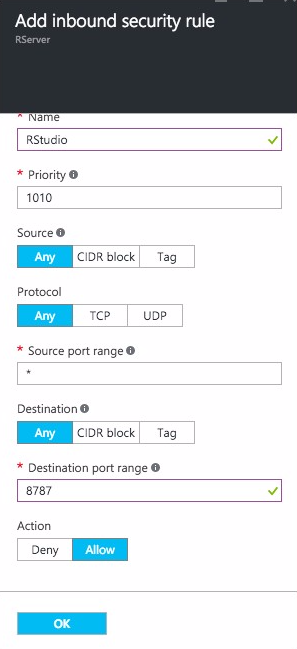
Click “OK” to continue.
Install R
We will now begin installing R and R Studio Server on the VM. Begin by logging
into the VM via SSH. You can find the public IP of the VM in the dashboard:
If you are using Windows, you can use PuTTY
to SSH into the VM. For Mac OS X or Linux, you can use one of the built in terminal emulators.
In your command-line terminal, SSH into the VM:
ssh rstudioserver@<<YOUR VM IP ADDRESS>>
Once logged in, we will first install R. There are a few different options for installing
R. We can use the version that is found in the default Ubuntu repositories. However, these
normally contain an out-of-date version of R. We will opt into using the latest version of R.
The following command will add the repository that will contain the latest version of R:
$ sudo sh -c 'echo "deb http://cran.rstudio.com/bin/linux/ubuntu trusty/" >>
/etc/apt/sources.list'
The following 2 commands are optional, but they will remove annoying warning messages
you will receive from the package manager after adding the previous repository. The first
command will download the associated GPG key.
$ gpg --keyserver keyserver.ubuntu.com --recv-key E084DAB9
The second command will add the key to the apt sources keyring:
$ gpg -a --export E084DAB9 | sudo apt-key add -
Next we will need to refresh the package lists using the following command:
We can now install the latest version of R:
$ sudo apt-get install r-base
Install R Studio Server
We can begin installing R Studio Server. We will first need to install a
package called ‘gdebi’. This package allows us to install DEB files and to
automatically resolve and dependencies for said DEB files. To install
‘gdebi’, enter the following command:
$ sudo apt-get install gdebi-core
Now, download the DEB file for R Studio Server:
$ wget https://download2.rstudio.org/rstudio-server-0.99.893-amd64.deb
To install the DEB file, enter the following command:
$ sudo gdebi rstudio-server-0.99.893-amd64.deb
R Studio Server should now be successfully installed! We can now
verify the installation using this command:
$ sudo rstudio-server verify-installation
If everything went well, you shouldn’t see any scary error messages.
Finally, we will create a new user account in order to access R Studio
Server. In the command line, enter the following command:
Enter a password and optionally fill out the rest of the information
that you have been prompted for.
Accessing R Studio Server
We can now access the server! In your web browser, enter:
http://yourVMipaddress:8787
You should hopefully see an R Studio login page:
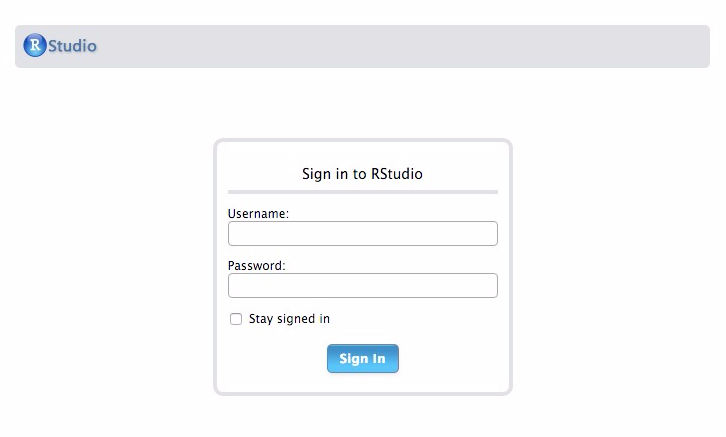
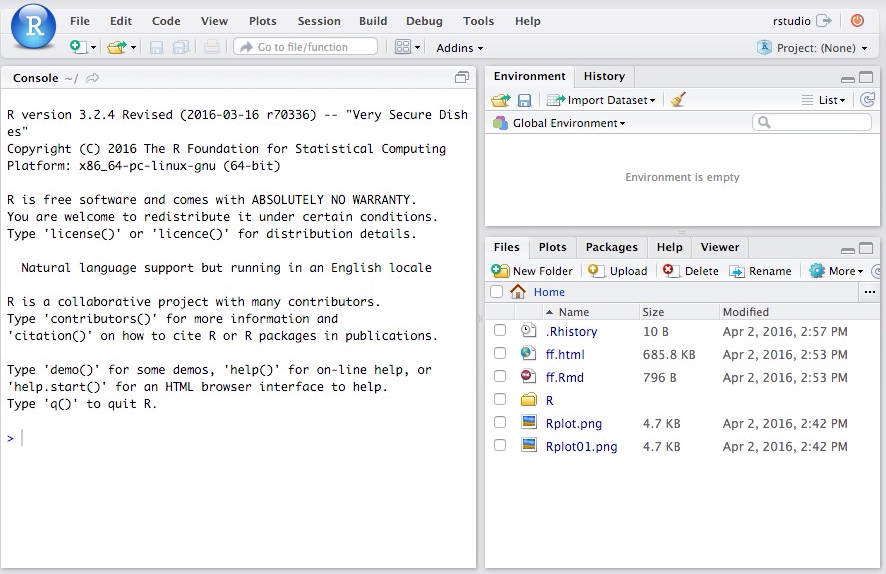
Enter the credentials of the user you recently created. You will be
redirected to your new R Studio workspace that you can access anywhere! Enjoy!
Cheers,
Connor Moreside
Resources
- Configuring R Server
- Azure Pricing Calculator